

Turkey 101
- Newton
- Nov 17, 2019
- 5 min read
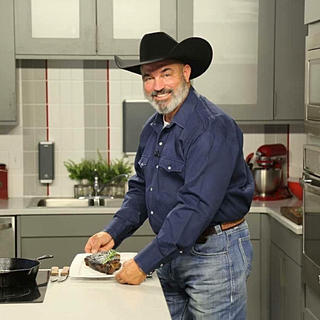


Let’s chat about cooking the “Bird”
The first “Thanksgiving” celebrated around 1621 indeed had turkey, as well as, other fowl, i.e. ducks geese, swans, grouse, etc. and a few deer shared by Wampanoag Indians.
The “birds” then were roasted in large pots with herbs, onions, nuts and berries. The traditional stuffing didn’t came about until 60 years later, probably by old mother Stouffer (joke).
Now, the Wampanoag Indians would prepare their turkeys and venison over an open fire via a spit. I can only imagine that those “birds” were drier than a West Texas powder house!
While the rest of the feast would include berries, potatoes, pumpkin etc. the cranberry didn’t quite make it to the first dinner due to its bitterness (sounds like my Aunt Marge) because the sugar supplies brought over on the Mayflower were quite depleted at that time. The feast itself was quite grand, and since then really has become most people’s favorite holiday. I know it’s mine due to the primary activity: the three F’s, food, football and friends, not discounting the celebration of the bountiful fall harvest, Thanks.
Now that the history lesson is over, (the pop quiz will follow shortly), let’s get down to business, bird business that is, and how you can pull off the perfect “bird”.
Bird selection is choice, however I search for the plumpest frozen bird out there. You don’t have to buy the Butterball. They’re very good “birds”, but I
do find the generic store brands are pretty dang good, as well. Just look for a wide, full bird with a full breast, keep those jokes to yourself, gents. Again, if brining, you’ll be adding additional moisture, so don’t get caught up in how much water they have injected. Remember, the general rule is 1 lb of “bird” per individual unless you have big “bird” eaters or want leftovers, then I would increase the amount to 1 1/2 lbs per individual.
Let’s choose your medium for cooking and what that will be, the traditional roasting, smoking, grilling - not to be confused with smoking, frying or the open spit (ugh, can you say dry?!)?
First, roasting in the oven or grandma’s large turkey roaster. I use my grandmothers 1930 GE styled in a nice Art Deco design. This is probably the most popular, and quite frankly the easiest method with its simplicity of stuffing the “bird”, setting the temperature and let GE do the rest.
After brining your “bird” you gotta season it , so season inside liberally with fresh cracked black pepper and kosher salt, now go stuff it. Stuffings can vary from mire poix, fruits, veggies, nuts, etc. Stuffings are like personalities, they vary broad and wide. This will be your canvas of creativity, and we will discuss more on stuffings in Tuesday’s blog.
Next, truss your “bird”. Simply tie the dang legs together and tuck the wings up against the body. Place the “bird” with the legs pointing up in a large enough roasting pan, one with a rack is great. I prefer to make a large mix of mire poix (chopped onions, carrots and celery) and maybe some large sliced apples to place the “bird” atop.
Once seasoned, stuffed, trussed and placed, that makes me giggle, it’s time for the cooking. Whether in the oven or roaster it’s pretty similar. In the oven, set the rack in the middle, unless your roasting pan has one of those elevated turkey racks, you may have to take it down one notch. Preheat your oven to 350°. Once up to temp, get that “bird” in the oven and let GE do it’s magic! Leave the ”peeking” to a minimum. Remember, ”if your looking, it ain’t cooking”. After the first 15 minutes of cooking,
reduce the temperature to 325°. Remember, every time you open that door to the oven you lose 25°, so let’s build up an extra supply of heat and get the temps stabilized for the cooking, because temperature variants and shifts will throw off the timing and possibly the doneness of your “bird”. Nothing worse than turkey sushi.
One other suggestion is to check your oven temperature with one of those hanging oven thermometers to make sure it’s cooking at that temperature you previously set.
Roasting your “bird” in the oven can vary. The standard rule is 15 minutes per pound, so if you have a 16 lb “bird”, that’s 3 hours. This knowledge may come in handy while shopping for that bird.
During the cooking process, if the legs start look like they’re burning at the tips and/ or the bird itself is getting beyond the golden brown, just get some foil and cover those tips and foil tent the body, making sure that the foil doesn’t touch the breast skin. You want the skin to stay intact with the “bird“. To check the “doneness” of your “bird” insert a thermometer into the thickest part of the thigh, and when it reaches 165° your “bird” is almost ready. I like to use a meat probe inserted in the thigh with the external thermometer, so when it hits a pre-programmed 160°, I’ll check the other thigh with a hand held thermometer. If it reads 165°, yank it,
baby!!
Now, you’ve got to rest the “bird”, so transfer the “bird” to the carving platter, cover with foil, and let that “bird” nap for 30, yes 30, minutes . See, this is why timing is so important. This is when you get the final preparations done like making graving, cooking the rolls, dragging your lazy ass husband’s big ol’ butt out of the recliner so he can get ready to carve that juicy “bird” while sitting at the head of the table spewing his thoughts on politics, football and why work is horrific until grandma puts the kibash to it. Oops, that was a flashback, hence forth to facts of the matter!
That pretty much covers the roasting in an oven. If using a roaster, all of the aforementioned apply sans setting the rack. Temperature control is key here, as well. Make sure the lid stays secure. If the bird is large and the lid isn’t secured tightly there are a couple of options aside from switching to the oven. Foil the sides of the oven and the lid, make sure the lid isn’t touching the skin. Just make some foil blocks and place between the roaster and lid, then cover the sides and lid with foil. A small towel that will cover the roaster will help retain the heat.
I would highly recommend putting a large sheet tray under the roaster to capture any condensation and/or moisture run off. Same rules apply - internal temp of 165°, rest and relax, get busy to eating!
Smoking a “bird” is quite similar, brine, stuff and let “Madge”, my smoker’s name, do her magic, however I run my temperature at 275°, and when the temperature in the thigh gets to 165° we’re done. I don’t let it rest as long, and sometime if smoking the day before, I’ll pull it at 150° and finish it off in the oven the next day. Timing a smoked bird can be problematic with winds, outside temps, peeking, inside temperature variants, etc. This is where patience and brown liquor come in handy. Just have fun!! If the bird gets too much color on the outside, you need to do the “Texas cheat” by finishing it off in the oven. You can also try to wrap it, generally that will make a mess of the bird.
A little practice and this bird will WOW your guests. You might even get lucky that night!
Frying a bird...to be continued


Comments